User Guide: Contacts
Contents
- Contacts
1.1 Add Contact
1.2 Import
1.3 Export
1.4 Groups
1.4.1 All Users
1.4.2 Your Favorites
1.4.3 Shared
1.4.4 My Contacts
1.4.5 Coworkers
1.4.6 Departments
1.4.7 Sites
1.4.8 Available Users
1.4.9 Busy Users
1.4.10 Offline Users
1.5 Contacts Status Icon
1.6 Chat with Contact
1.7 Edit
 1. Contacts
The Contacts Center icon, as seen in figure 1.a, is where all users with List in Directory enabled under their profile are listed. If you do not see a user listed in the contacts, List in Directory has been disabled.
 1.1 Add Contact
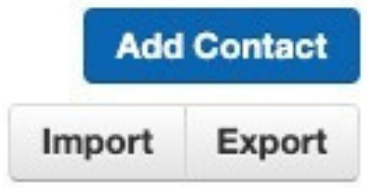
The Add Contact button in the right-hand corner, as seen in figure 1.1.a, will open the New Contact window, as seen in 1.1.a, and allow you to enter a new contact that will be displayed in your account’s contacts.
1.2 Import
The import option allows you to import contacts from a CSV file (Outlook, Google, and Apple vCard) that will bulk create users in your contacts.
1.3 Export
The Export button will allow you to create a CSV file for the contacts group selected in the Contacts to Export drop-down. The Export format will export the CSV file into an Outlook, Google, or Apple vCard CSV file format.
1.4 Groups
On the Contacts page, you will see a drop-down as seen in figure 1.4.a that will let you filter for desired groups. When numbers are blocked by your domain, adding the number to the Allow list will let you bypass the domain block and still receive calls from that number/user.
1.4.1 All Users
Displays all users on the system with List in Directory enabled.
1.4.2 Your Favorites
Displays contacts you selected as favorites. You can add a contact to favorites by clicking the star next to the contact’s name as seen in figure 1.4.2.a.
1.4.3 Shared
Shared Contacts are contacts that are available to the entire organization. These contacts are added by Office Managers.
1.4.4 My Contacts
Contacts you have manually added by clicking the Add Contact button in the top right.
1.4.5 Coworkers
Displays all contacts in the organization with List in Directory enabled.
1.4.6 Departments
This filter breaks users down by the Department entered on their user profile.
1.4.7 Sites
This filter splits users up by the Site their user profile is assigned to.
1.4.8 Available Users
Displays contacts that are available to be called or chat via the portal.
1.4.9 Busy Users
Are users currently on the phone or have their status set to Do Not Disturb.
1.4.10 Offline Users
Users who do not have a registered device or are not logged into the portal and available to chat.
When selecting a contacts group option, the contacts for that group will appear as seen in figure 1.4.9.a. You can sort them by Name.
1.5 Contacts Status Icon
- Green: Contacts displayed with a green dot are available.
- Blue: Contacts displayed with a smaller blue dot in front of the green dot means that person is available to chat in the portal.
- Red: If the contact has a red dot, that means the user is currently busy.
To begin a chat with a user, click the Chat icon to the right as seen in figure 1.5.a. Next to the Chat icon, you will see the Edit Contact icon.
1.6 Chat with Contact
Clicking the Chat icon seen in figure 8.5.a will open a chat window with that user.
1.7 Edit
The Edit icon to the right of the contact will open the Edit Contact window where you can configure the contact with a different:
- First Name
- Last Name
- Work Number
- Mobile Number
- Home Number
- Fax Number
- Email Address
The extension number cannot be changed.
If these steps don't resolve the issue, we’ll need to investigate further. Submit a support ticket here and we’ll look into the issue.
Related Articles
WebPhone User Guide
To open the webphone, login to the customer portal and click the link at the top right of your screen that says "Apps" then "Webphone" There are two different sizes of the webphone that optimize it better for your use. The first size is similar to ...Voicemail Quick Reference Guide
USING THE VOICEMAIL SYSTEM The voicemail system is menu driven. Listen to the voice prompts and then press the keys on your phone to select which option you would like. ACCESSING VOICEMAIL The first time you access you voicemail box you will be asked ...User Password Reset
To reset their password, users can log in to the Tele Express Portal and select the "Forgot Password" option. By entering their login name, they will receive a password retrieval link via email. If they do not know they login name, they are able to ...How do I pick up a call with star codes
Introduction In a dynamic work environment, the ability to efficiently manage incoming calls is crucial. On Tele Express' VoIP platform, star codes can be used to facilitate various types of call pickups. This article is intended for IT professionals ...Messages
1 Messages Guide Contents Messages 1.1 Voicemail Tab 1.1.1 Call to Play 1.1.2 Forward Voicemail 1.1.3 Download Voicemail 1.1.4 Save 1.1.5 Delete 1.2 Chat and SMS Tab 1.2.1 Start a New Conversation 1.2.2 Replying to Messages 1.2.3 Delete a Message 1.3 ...